

Photo by John Schnobrich on Unsplash
How to Create a VPN Gateway in Microsoft Azure: A Step-by-Step Guide


Are you curious about secure connections in today's digital world? A VPN (Virtual Private Network) is essential for secure communication, especially in cloud computing.
In this article, I will guide you through the process of creating a VPN Gateway in Microsoft Azure. By the end, you will understand its benefits and be able to set one up yourself.
What is a VPN Gateway?
A VPN Gateway in Azure is a service that establishes secure connections between on-premises networks and Azure. It ensures that data travels securely across the internet, protecting it from unauthorized access.
Why Use a VPN Gateway?
Enhanced Security
A VPN Gateway encrypts connections, ensuring data security.
It protects data from unauthorized access during transmission.
Remote Access
Allows users to connect securely from different locations.
Facilitates remote work by providing secure access to network resources.
Hybrid Cloud Connectivity
Supports businesses using both on-premises and cloud resources.
Ensures seamless integration between local and cloud environments.
Simplified Network Management
Provides a unified method to connect various network segments.
Reduces complexity and potential points of failure.
High Availability and Reliability
Azure offers redundant gateways and multiple paths.
Ensures stable and reliable connections, minimizing downtime.
Regulatory Compliance
Helps meet data protection and privacy requirements.
Ensures encrypted and secure data transmission.
Benefits of Using VPN Gateways in Azure
Enhanced Security
VPN Gateways encrypt your data, ensuring it stays secure. This encryption complies with industry standards, providing peace of mind.
Scalability and Flexibility
VPN Gateways can scale according to your business needs. Whether you need to connect multiple networks or handle increasing traffic, VPN Gateways offer the flexibility to do so.
Cost-Effectiveness
Using a VPN Gateway is cost-effective compared to traditional methods. It reduces the need for expensive hardware and maintenance, allowing you to focus on your core business activities.
Steps to Create a VPN Gateway in Azure
Step 1: Setting Up Your Azure Account
Create an Azure account
Visit the Azure portal.
Sign up using your email address.
Provide payment details (Azure offers a free tier for beginners).
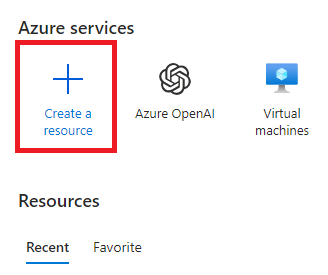
Step 2: Creating a Virtual Network
Let’s create a resource.
Go to 'Create a resource'
- Select 'Virtual Network'.
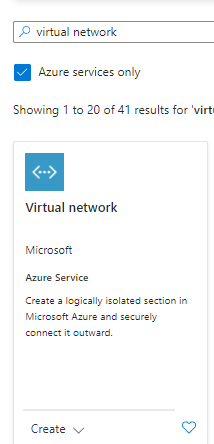
- Click create.
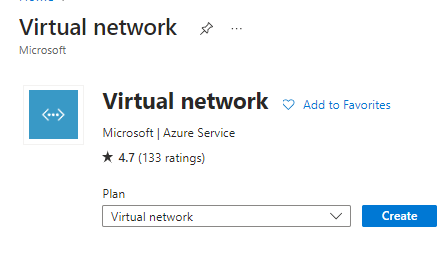
Enter the required information:
Name: Choose a unique name for your Virtual Network.
Address Space: Define the IP address range (e.g., 10.0.0.0/16).
Resource Group: Select an existing group or create a new one.
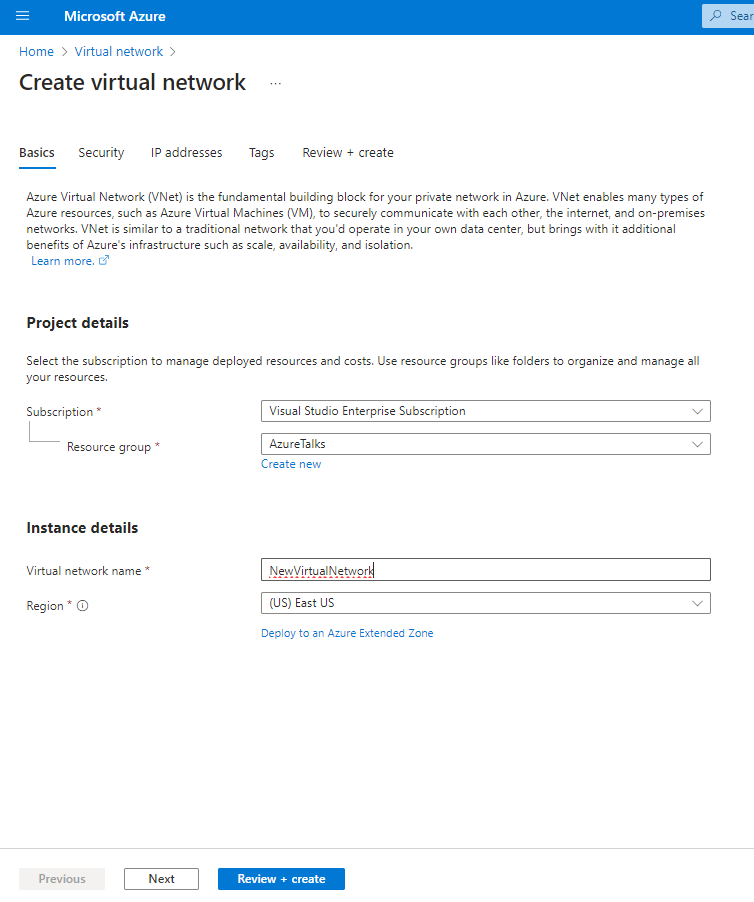
- Configure subnets as needed.
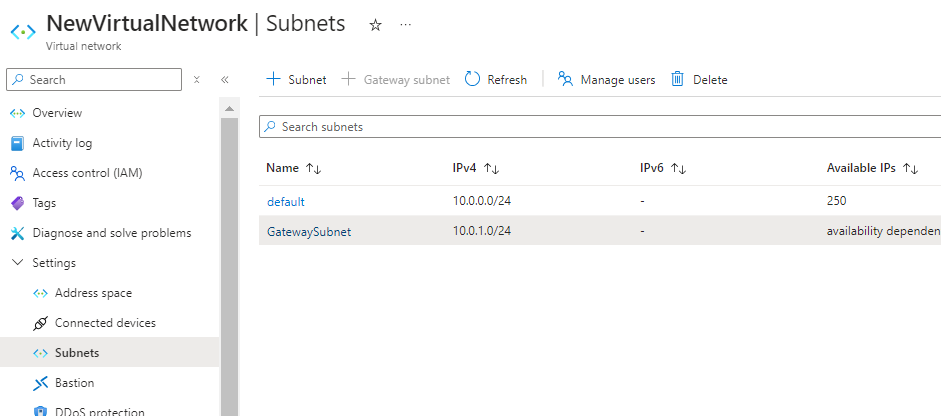
Step 3: Adding a Gateway Subnet
Select your Virtual Network
Go to 'Subnets'.
Click on 'Gateway Subnet'.
Assign an address range:
Ensure it is within the Virtual Network's address space.
Example: 10.0.1.0/24.
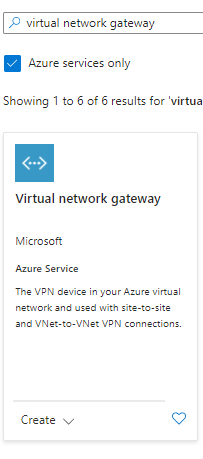
Step 4: Creating the VPN Gateway
Go to 'Create a resource'
- Search for 'Virtual Network Gateway'.
Enter the following details:
Name: Unique name for the VPN Gateway.
Region: Select the same region as your Virtual Network.
Gateway Type: Choose 'VPN'.
VPN Type: Select 'Route-based' or 'Policy-based' depending on your needs.
SKU: Select the appropriate SKU (e.g., VpnGw1, VpnGw2).
Virtual Network: Select the Virtual Network created earlier.
Gateway Subnet: Confirm the subnet created in the previous step.
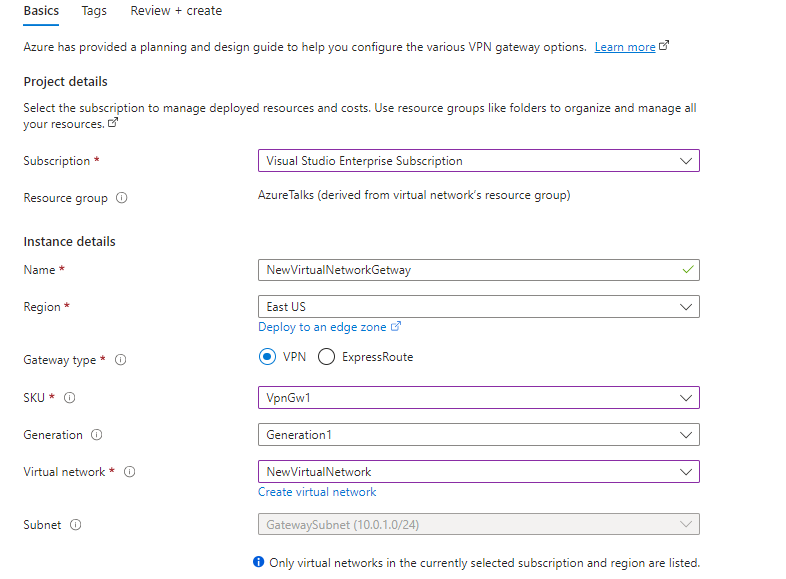
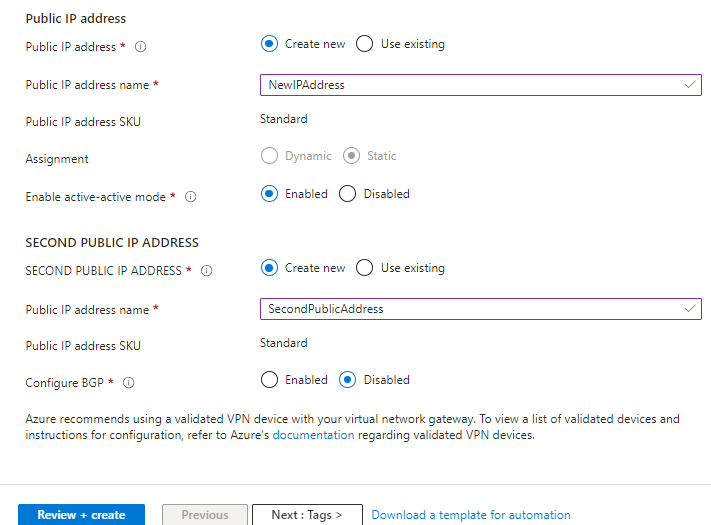
- Create a new public IP address or select an existing one. This IP address will be assigned to the VPN Gateway.
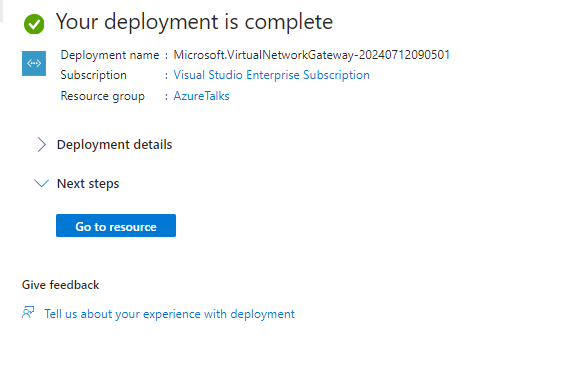
- Ensure all the details are correct and then click 'Create' to deploy the VPN Gateway.
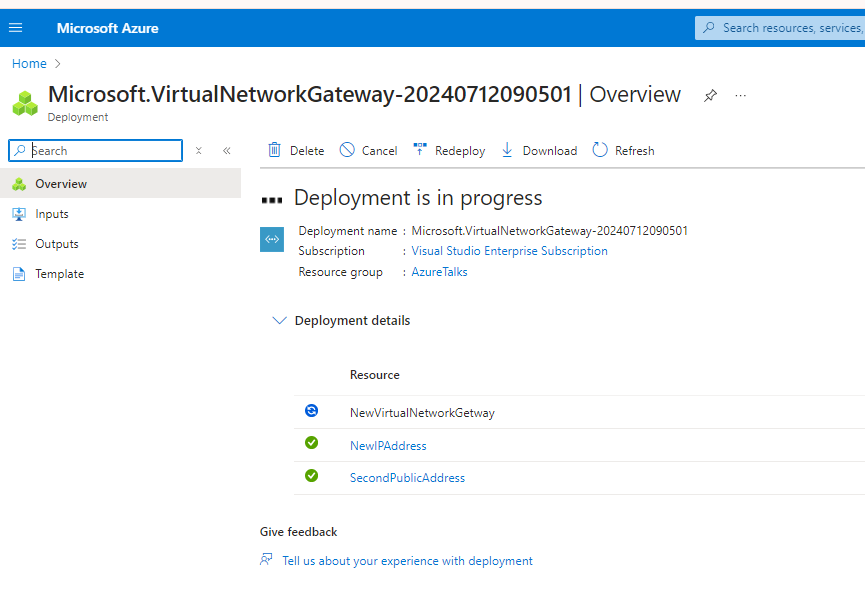
This process can take around 20-30 minutes to complete.
Step 5: Configuring the VPN Connection
Set up the on-premises network
Define the on-premises VPN device IP address.
Configure the device to connect to Azure.
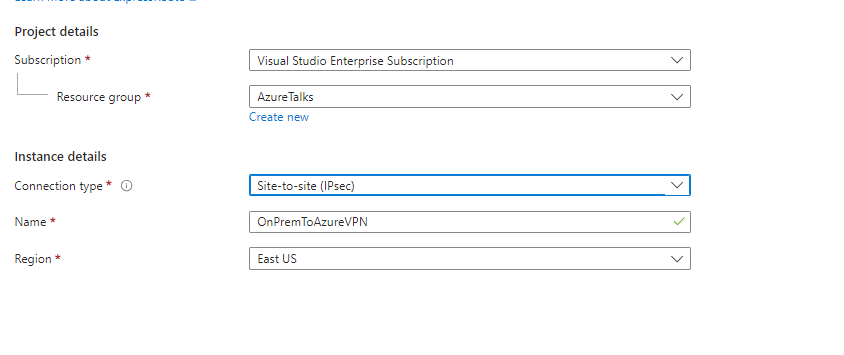
Create a connection in Azure
In the Azure portal, navigate to the 'Virtual Network Gateway' resource that you created in Step 4.
Select 'Connections'.
Click 'Add' to create a new connection.

Enter the connection details:
Name: Unique name for the connection.
Connection Type: Choose 'Site-to-site (IPsec)'.
Shared Key: Enter a shared key (must match the key on the on-premises device).
Local Network Gateway: Select or create a Local Network Gateway with the on-premises network information.
Finalize the setup
Review the settings.
Click 'OK' to create the connection.
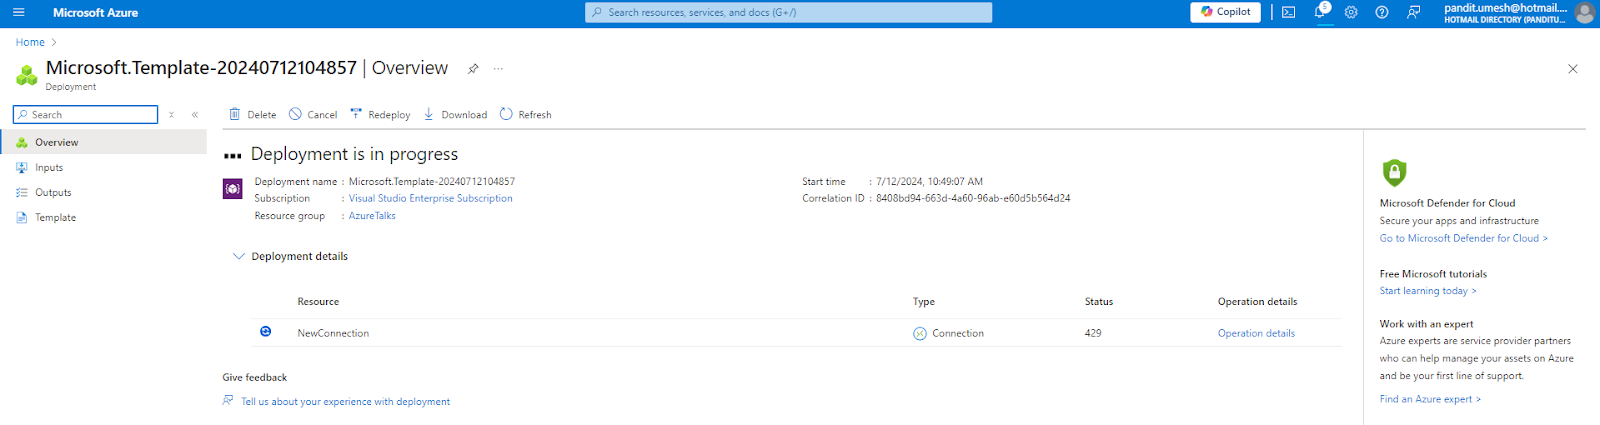
Monitor the connection status to ensure it is established. The deployment process may take 20-30 minutes, so be patient.
Practical Tips for Success
Regular Monitoring
Regularly monitor your VPN Gateway for any issues. Use Azure's monitoring tools to track performance and detect problems early.
Documentation and Backup
Maintain detailed documentation of your setup process. This documentation helps in troubleshooting and future configurations. Also, ensure you have regular backups to protect your data and configurations.
Personal Insights
In this article, we explored the importance of VPN Gateways in Azure. We discussed their benefits and walked through the steps to create one. Setting up a VPN Gateway might seem challenging at first, but with careful attention to each step, it becomes manageable. Personally, I find the security and flexibility it offers to be incredibly valuable.
Follow Umesh Pandit